TEL:+86 132 6656 7067





When an optical transceiver is inserted into a switch, router or server, several hardware and software processes must complete before the connection can carry network traffic. The host must detect the module, establish communication with its management interface, identify its capabilities and configure the electrical and optical data paths. The transmitter and receiver must then operate correctly, and the physical link must reach the required synchronization and operational state.
These processes are often described collectively as optical transceiver link establishment, but they involve several distinct stages. Module initialization confirms that the transceiver is powered and ready for configuration. Data path activation prepares the module's transmit and receive channels. Link establishment confirms that the local and remote network interfaces can communicate using the selected physical-layer configuration.
Understanding the sequence helps engineers distinguish module detection problems from configuration failures, optical signal issues and physical link synchronization errors.
1. What Is Optical Transceiver Link Establishment?
Optical transceiver link establishment is the process through which a host device and its optical module become ready to exchange data with a remote network interface. It involves module management, electrical signaling, optical transmission and physical-layer coordination.
A typical optical connection includes two transceivers connected through an optical fiber link. Each transceiver converts electrical signals from its host into optical signals and converts received optical signals back into electrical data.
↓
Local Optical Transceiver
↓
Optical Fiber Channel
↓
Remote Optical Transceiver
↓
Remote Host Switch
Before the link becomes operational, several conditions must be satisfied:
The host must recognize the inserted module.
The module must complete its power-up and management initialization.
The module must support the selected data rate and application.
The host and module must configure compatible electrical and optical channels.
The optical transmitter and receiver must operate within their specified conditions.
The remote device must support a compatible link configuration.
The physical layer must achieve the required signal synchronization and link status.
Not every system follows an identical sequence. The exact process depends on the form factor, management specification, Ethernet or InfiniBand implementation, host firmware and transceiver architecture.
2. Stage One: Module Detection After Insertion
The first step occurs when the optical transceiver is physically inserted into the host's cage and connector. The host must determine that a module is present before it can begin normal management communication.
Depending on the form factor, module presence may be indicated through a dedicated hardware signal such as ModPrsL. In applicable QSFP implementations, this signal changes state when the module is inserted, allowing the host to detect its presence.
After detection, the host can begin the appropriate power-up and management sequence.
During this stage, the host may check:
Whether the module is physically present.
Whether the connector and electrical contacts are functioning correctly.
Whether the module is compatible with the host's supported form factor.
Whether the module can receive power within the host's permitted power conditions.
Module detection does not establish the optical link. It only confirms that the host has detected the hardware and can proceed with initialization.
3. Stage Two: Power-Up and Module Reset
After module insertion, the host and transceiver complete the required power-up and reset operations. The module's internal electronic circuits must reach a stable operating condition before management and data-path configuration can proceed.
During power-up, internal power-management circuits provide regulated supply rails to components such as the microcontroller, DSP, CDR, laser driver and receiver circuitry, depending on the module architecture.
Reset operations establish a known initial configuration. They may clear previous settings and return supported control registers to their default states.
The host must also observe the module's power requirements. Higher-speed modules may have multiple power modes or power classes, and the host must provide sufficient power before enabling the intended operating mode.
Some modules complete their initial reset sequence automatically when power is applied. Others support hardware or software reset controls. The exact timing and control behavior should be verified against the applicable management and hardware specifications.
4. Stage Three: Management Interface Initialization
Once the module's management circuitry becomes available, the host establishes communication through the low-speed management interface.
Many pluggable optical modules use an I2C-based two-wire interface or a compatible management interface. The host uses this connection to access module identification, configuration registers, operating status and diagnostic information.
For example, the host may retrieve:
Manufacturer and product identification.
Module part number and serial number.
Supported data rates and optical applications.
Module power requirements and operating capabilities.
Temperature, voltage and optical diagnostic information.
Warning, alarm and initialization status flags.
Modern QSFP-DD and OSFP modules commonly use the Common Management Interface Specification (CMIS). Older module families may use specifications such as SFF-8472 or SFF-8636.
The management interface is separate from the high-speed data lanes. A module can respond correctly to management requests even when its optical transmitter is disabled or its network link is not yet established.
5. Stage Four: Module Capability Identification
After management communication becomes available, the host reads the module's advertised capabilities. This step is important because modules with the same physical form factor may support different data rates, optical interfaces, lane configurations and applications.
The host needs to determine whether the module supports the intended network configuration.
| Capability | Information Identified | Why It Matters |
|---|---|---|
| Form factor | SFP, QSFP28, QSFP-DD, OSFP and related types | Determines physical and electrical interface compatibility |
| Data rate | Supported Ethernet or InfiniBand operating rates | Ensures the selected application matches the host |
| Lane configuration | Number of electrical and optical lanes | Determines channel mapping and data-path configuration |
| Optical application | SR, DR, FR, LR and other supported variants | Ensures the fiber and optical link meet application requirements |
| Management capability | Supported management protocol and features | Determines how the host configures and monitors the module |
| Power capability | Supported power mode and consumption requirements | Ensures the host can supply the required power |
In CMIS-based modules, application advertisement provides information about supported host electrical interfaces, media interfaces and lane configurations. The host uses this information to select an appropriate application.
If the host requests an unsupported configuration, the module may reject the configuration or fail to activate the required data path.
6. Stage Five: Application Selection and Data Path Configuration
After identifying module capabilities, the host selects an appropriate application and configures the data paths. This is particularly important for multi-lane QSFP-DD and OSFP modules.
For example, a 400G optical module may support multiple optical applications with different media lane arrangements and transmission distances. The host must select a configuration that matches the module's advertised capabilities and the platform's electrical interface.
Data-path configuration may include:
Selecting the required application descriptor.
Assigning host electrical lanes to the appropriate module data paths.
Configuring lane-related parameters.
Applying supported signal-conditioning or control settings.
Preparing the transmitter and receiver resources for activation.
In CMIS, module-level state and data-path state are managed separately. A module can be fully powered and report ModuleReady while its data paths remain deactivated.
This distinction is important because ModuleReady means that the module is ready for host configuration. It does not prove that all high-speed channels are active or that a network link has been established.
7. Stage Six: Data Path Activation
Once the host has configured the required data paths, it can request their activation. The module then prepares the associated internal resources and transitions the data path through its defined activation sequence.
For a CMIS-managed module, the data path state machine tracks the initialization and operational status of the configured data path.
A simplified sequence is:
↓
DPInit
↓
DPDeinit or Configuration Completion as Applicable
↓
DPTxTurnOn
↓
DPActivated
The exact transitions depend on the requested configuration, module implementation and CMIS revision. In a typical activation process, the host configures the data path, enables the required transmitter outputs and waits for the module to report successful activation.
The module may use an interrupt to notify the host when a state change has occurred. The host can then read the relevant status and flag registers to confirm the result.
Data path activation indicates that the module's configured resources are operational. It does not necessarily mean that the remote device has completed link establishment.
8. Stage Seven: Transmitter and Receiver Become Operational
After the required data paths are activated, the optical transmitter and receiver can perform their intended functions.
On the transmit side, the host sends electrical data through the module's high-speed input lanes. Depending on the architecture, the module may use a DSP, CDR or linear signal-conditioning circuit before the laser driver or optical modulator produces the optical signal.
On the receive side, the photodetector converts incoming light into an electrical signal. A transimpedance amplifier (TIA) and other receiver circuits process the signal before it is returned to the host through the high-speed electrical output lanes.
Host SerDes
↓
Module Electrical Input
↓
DSP / CDR / Signal Conditioning (where used)
↓
Laser Driver and Optical Transmitter
↓
Optical Fiber
Receive Path
Optical Fiber
↓
Photodetector
↓
TIA and Receiver Processing
↓
Module Electrical Output
↓
Host SerDes
The exact signal-processing functions depend on the module architecture. Not every optical transceiver contains a conventional DSP or retiming CDR. Linear and other specialized designs may use different signal paths.
At this stage, engineers may also check transmitter enable status, optical output power, receiver input power and module diagnostic flags.
9. Stage Eight: Physical-Layer Synchronization and Link Training
Once the local module's data paths are operational, the host and remote interface must establish the required physical-layer communication.
This stage depends heavily on the Ethernet or InfiniBand standard, electrical interface, optical application and device implementation.
Possible physical-layer operations include:
Receiving and detecting the incoming signal.
Achieving clock and data recovery where applicable.
Establishing lane alignment and synchronization.
Completing required link training on interfaces that use it.
Configuring or verifying FEC operation.
Completing physical-layer status checks.
Link training is not required in every optical link. Some Ethernet optical interfaces rely on defined PCS synchronization and lane alignment procedures rather than a separate link-training exchange. Other electrical interfaces or applications may use link training to optimize receiver equalization and signal performance.
Similarly, auto-negotiation is not universal across all optical transceiver links. Its availability and behavior depend on the specific Ethernet interface and network configuration.
A module can reach ModuleReady and DPActivated while the host still reports that the network interface is down. The remote signal, lane synchronization, PCS status, FEC condition and network configuration may still need to be verified.
10. Stage Nine: Link Verification and Operational Status
After physical-layer synchronization and required protocol procedures are complete, the host checks whether the connection is operational.
Link verification may involve several status indicators and performance measurements:
| Verification Item | What It Confirms | Typical Information Source |
|---|---|---|
| Module state | Module has completed initialization and is operational | CMIS or form-factor management registers |
| Data path state | Configured module data paths have been activated | CMIS data-path status |
| Tx optical power | Transmitter output is within the expected range | DDM/DOM or module diagnostics |
| Rx optical power | Incoming optical signal is detected at the receiver | DDM/DOM or module diagnostics |
| PCS synchronization | Physical coding sublayer has achieved the required synchronization | Host ASIC or network interface status |
| FEC statistics | Error correction is operating within expected limits | Host or switch interface counters |
| Network link status | The interface reports an operational connection | Operating system, switch or router interface status |
A successful link-up status is an important milestone, but it does not guarantee that the connection will maintain optimal performance under all traffic and environmental conditions. Engineers should also monitor error counters, optical power and FEC statistics after the link becomes operational.
11. How Link Establishment Differs Across SFP, QSFP-DD and OSFP
The general link-establishment principles are similar across pluggable optical modules, but the number of lanes, management interfaces, power requirements and initialization procedures vary by form factor.
| Module Family | Typical Data Lane Structure | Common Management Specification | Typical Application |
|---|---|---|---|
| SFP / SFP+ | One transmit and one receive lane | SFF-8472 | 1G and 10G connectivity |
| QSFP28 | Four transmit and four receive lanes | SFF-8636 | 40G and 100G connectivity |
| QSFP-DD | Eight transmit and eight receive lanes | CMIS in common implementations | 200G, 400G and 800G connectivity |
| OSFP | Eight transmit and eight receive lanes in common implementations | CMIS in common implementations | 400G, 800G and 1.6T platforms |
These are representative configurations. The exact lane rates, electrical signaling, management revision and optical applications depend on the product and applicable standards.
Modern high-speed modules require more detailed application and data-path configuration than many earlier single-lane modules. This makes host firmware, CMIS support and platform compatibility increasingly important.
12. What Can Prevent an Optical Link from Establishing?
A link may fail to establish even when the module is physically inserted and its management interface is accessible. The cause can exist at several different layers of the connection.
| Failure Stage | Possible Cause | Typical Symptom |
|---|---|---|
| Module detection | Connector contact issue or unsupported module | Host does not recognize the module |
| Power-up | Insufficient power or abnormal supply conditions | Module fails to initialize or reports a fault |
| Management initialization | I2C communication issue or management incompatibility | Module information cannot be read correctly |
| Capability identification | Unsupported application or incompatible configuration | Host cannot select the intended operating mode |
| Data path activation | Invalid lane configuration or module initialization failure | Data path remains deactivated or reports a fault |
| Optical transmission | Transmitter disabled, fiber disconnected or incorrect optical interface | No usable optical signal reaches the remote side |
| Physical-layer synchronization | Lane mapping, signal quality, FEC or configuration mismatch | Link remains down or synchronization fails |
| Remote compatibility | Different speed, optical application or protocol configuration | Local and remote interfaces cannot establish a common link |
It is important to identify the stage at which the process stops. Replacing an optical module without checking management status, data-path configuration and remote compatibility may not resolve the underlying problem.
13. How to Troubleshoot Optical Transceiver Link Establishment
A structured troubleshooting process helps isolate whether a problem originates in module initialization, electrical configuration, optical transmission or remote-device compatibility.
Step 1: Confirm module detection. Check whether the host recognizes the module and displays its identification information.
Step 2: Check module initialization. Review the module state, reset status, management readiness and any reported fault flags.
Step 3: Verify the selected application. Confirm that the host configuration matches the module's advertised data rate, lane arrangement and optical interface.
Step 4: Check data-path activation. For CMIS modules, inspect the data-path state and relevant activation status rather than relying only on ModuleReady.
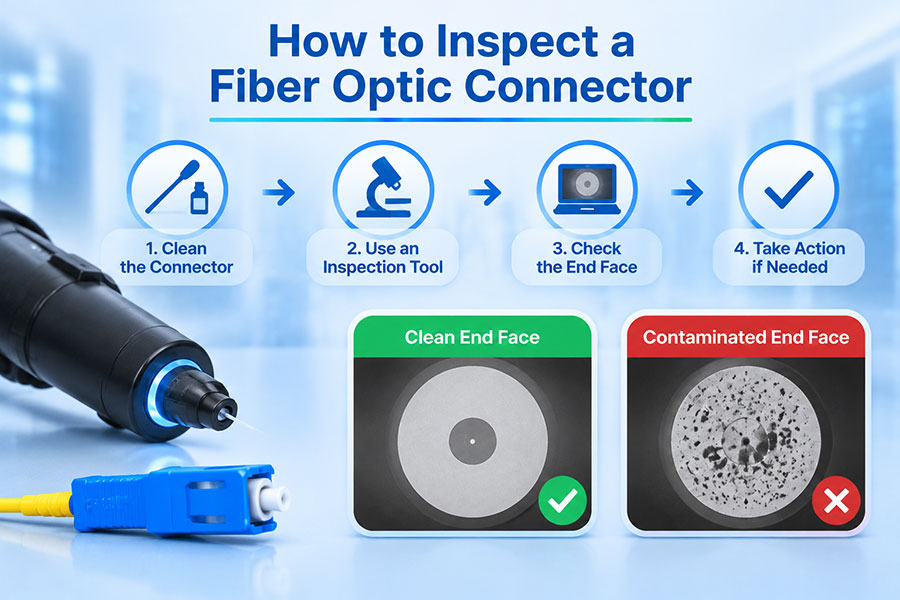
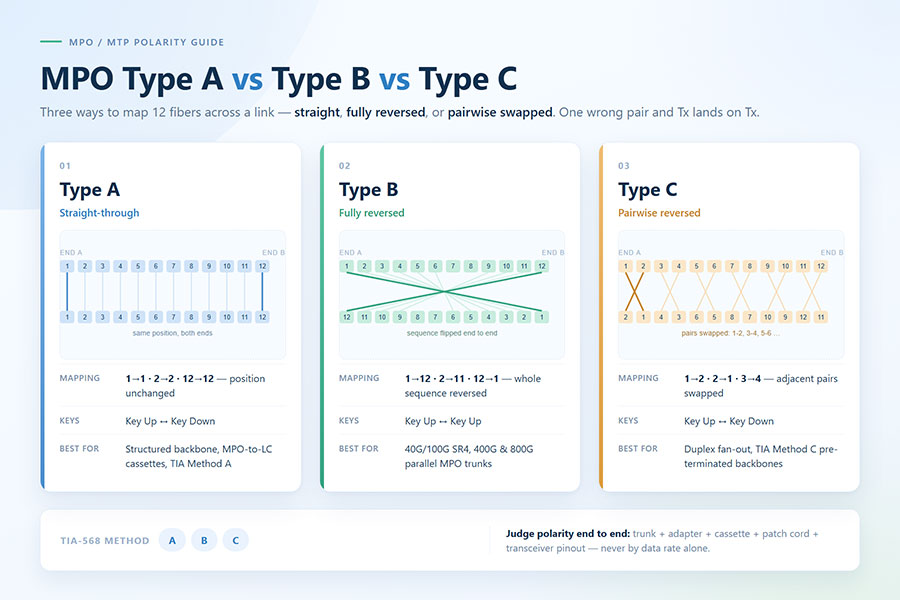
Step 5: Verify optical connectivity. Check fiber type, connector compatibility, polarity, Tx/Rx direction and connector cleanliness.
Step 6: Review optical diagnostics. Compare Tx and Rx power with the module's specified operating range and check temperature and voltage status.
Step 7: Inspect physical-layer status. Review lane synchronization, PCS status, FEC counters and applicable link-training information.
Step 8: Confirm remote configuration. Check that both ends support compatible data rates, optical applications and physical-layer settings.
Step 9: Verify operational stability. Once the link comes up, monitor error counters and optical diagnostics under normal traffic conditions.
This layered approach is more effective than treating every link-down condition as an optical power problem.
14. C-LIGHT 400G OSFP and High-Speed Link Establishment
High-speed optical modules require coordinated host configuration, module management and optical signal transmission. This is particularly important in 400G data center networks, where multiple electrical and optical lanes must operate together.
The C-LIGHT 400G OSFP Optical Transceiver is designed for AI data centers, cloud computing networks and high-performance computing applications.
The product information specifies support for the CMIS Rev. 5.2 interface protocol and an OSFP MSA hardware package. The module family supports multiple 400G optical configurations, including:
400G SR4: 850 nm multimode transmission, with a listed Ethernet reach of 100 m.
400G DR4: Single-mode parallel transmission, with a listed reach of 500 m.
400G FR4: LAN-WDM single-mode transmission, with a listed reach of 2 km.
400G LR4: LAN-WDM single-mode transmission, with a listed reach of 10 km.
During deployment, the host must select a supported application and configure the required electrical and optical data paths. The remote device and fiber channel must also match the selected optical interface.
For 400G and higher-speed systems, successful integration depends on more than physical module insertion. CMIS compatibility, lane mapping, host SerDes support, power capability, thermal conditions and optical link parameters all contribute to reliable link establishment.
15. Conclusion
Optical transceiver link establishment is a coordinated process involving hardware detection, power-up, management initialization, capability identification, application selection, data-path activation and physical-layer synchronization.
ModuleReady confirms that the module has completed its module-level initialization and is available for host configuration. Data-path activation confirms that the configured internal channels are operational. Network link-up requires additional conditions, including compatible remote equipment, valid optical connectivity and successful physical-layer operation.
As networks move toward 400G, 800G and 1.6T optical connectivity, understanding these separate stages becomes increasingly important. A systematic approach to initialization, configuration and link verification helps engineers identify failures accurately and maintain reliable high-speed network connections.
C-LIGHT provides optical transceiver solutions for Ethernet, InfiniBand, AI data centers and telecom networks. For assistance with module selection, CMIS compatibility, optical reach and host integration, Contact C-LIGHT.
 >

 >
 >
 >
 >
 >
 >
 >