TEL:+86 132 6656 7067





Optical loss is one of the most important performance indicators in fiber optic networks. Even when a fiber cable is correctly installed and its connectors appear undamaged, excessive attenuation or connection loss can reduce the received optical power and affect transmission reliability. Measuring the actual loss of an installed fiber link helps engineers verify cable quality, confirm optical power margins, and identify problems before network deployment.
The standard approach is to measure insertion loss using a light source and optical power meter or an Optical Loss Test Set (OLTS). The test establishes a reference power level and measures how much optical power is lost after passing through the fiber link. OTDR testing can then provide additional information about the location and characteristics of individual events.
1. What Is Optical Loss in a Fiber Link?
Optical loss, also called insertion loss, is the reduction in optical power between the input and output of a fiber link. It is measured in decibels (dB) and includes the combined effects of fiber attenuation, connector interfaces, fusion splices, and passive optical components.
A fiber link with excessive insertion loss may deliver insufficient power to the receiving transceiver. This can cause a link to remain down, experience intermittent disconnections, or operate with limited optical margin.
For example, if the reference power is -3.0 dBm and the measured output power is -5.2 dBm, the insertion loss is:
The result means that the tested link introduces 2.2 dB of optical power loss under the measurement conditions.
2. Equipment Required for Fiber Optic Loss Testing
A reliable insertion loss measurement requires suitable test equipment, compatible reference cables, and clean optical interfaces. The equipment must match the fiber type and wavelength being tested.
Generates a stable optical signal at the required wavelength. The source should match the fiber type and test application.
Measures received optical power. It must support the test wavelength and an appropriate measurement range.
Provide the launch and receive connections required for the selected reference method. Their fiber type and connector interfaces must be suitable for the link.
Combines source and meter functions in a coordinated test system, simplifying end-to-end insertion loss measurement.
Checks connector end faces for contamination, scratches, and other defects that can affect measurement accuracy.
Analyzes backscattered and reflected light to help locate breaks, bends, splices, and other events along the fiber route.
3. Select the Correct Test Wavelength
Fiber loss depends on wavelength, so testing must use wavelengths appropriate for the fiber category and intended application. A measurement taken at the wrong wavelength may not represent the link's actual operating performance.
| Fiber Type | Common Test Wavelength | Typical Application |
|---|---|---|
| Multimode OM1 / OM2 | 850nm and 1300nm | Legacy multimode Ethernet and fiber links |
| Multimode OM3 / OM4 / OM5 | 850nm and, where required, 1300nm | High-speed short-reach data center links |
| Single-Mode OS1 / OS2 | 1310nm and 1550nm | Campus, metro, access, and long-reach Ethernet links |
| Single-Mode PON | Application-specific wavelengths | GPON, XG-PON, XGS-PON, and other access systems |
For conventional multimode testing, 850nm and 1300nm are common test wavelengths. Single-mode systems are commonly tested at 1310nm and 1550nm. PON and other specialized systems may require additional wavelengths according to their specifications.
4. How to Test Fiber Link Insertion Loss with a Light Source and Power Meter
The light source and power meter method directly measures the optical power transmitted through the installed fiber path. It is widely used for cable installation acceptance, maintenance, and troubleshooting.
Inspect the connector end faces with a suitable fiber inspection microscope. Clean contaminated connectors and adapters using approved tools. Reference cables should also be checked to ensure that they do not introduce unnecessary loss.
Step 2: Prepare the test equipmentSelect a light source and power meter suitable for the fiber type and wavelength. Allow the equipment to stabilize according to the manufacturer's instructions.
Step 3: Connect the reference cableConnect the source to a suitable launch reference cable. Use the reference cable arrangement required by the selected test method and applicable standard.
Step 4: Establish the 0 dB referenceMeasure the reference output power and set the power meter to its reference or zero-loss state. This establishes the baseline against which the installed link will be measured.
Step 5: Connect the fiber link under testConnect the launch reference cable to one end of the installed fiber link and the receiving reference cable and power meter to the other end, following the selected reference procedure.
Step 6: Record the measured lossRead the insertion loss from the meter or calculate it from the reference and measured optical power. Record the wavelength and reference method used.
Step 7: Repeat for all required fibersTest each fiber strand and each required wavelength. For duplex and parallel-optics systems, confirm that all intended transmit and receive paths have been tested.
The reference method matters. One-cord, two-cord, and three-cord reference configurations can produce different results because they include different portions of the reference connections in the measurement. Follow the method required by the relevant test standard or project specification, and do not change the reference setup midway through an acceptance test.
5. How to Calculate Optical Loss from Test Results
Optical loss can be calculated by subtracting the measured output power from the established reference power. Both readings are expressed in dBm, while the difference is expressed in dB.
Consider an installed single-mode fiber link tested at 1310nm. The reference power is -2.0 dBm, and the power meter measures -4.8 dBm at the far end.
| Measurement Item | Value |
|---|---|
| Test wavelength | 1310nm |
| Reference optical power | -2.0 dBm |
| Measured output power | -4.8 dBm |
| Calculated insertion loss | 2.8 dB |
The measured link loss is 2.8 dB. Whether this result passes depends on the calculated loss budget, applicable standard, fiber length, connector count, splice count, and project acceptance limit.
6. How to Determine Whether the Measured Loss Is Acceptable
A measured loss value should not be judged in isolation. Engineers need to compare it with the expected link loss and the optical power budget of the transmission system.
The available optical budget represents the maximum loss permitted between the transmitter and receiver under the specified operating limits. The installed cable plant must remain within that allowance, with sufficient margin for engineering and operating conditions.
A simplified cable loss estimate can be calculated as:
For example, consider a 10 km single-mode link with the following illustrative values:
| Loss Component | Assumed Value | Calculated Loss |
|---|---|---|
| Fiber attenuation | 0.35 dB/km × 10 km | 3.5 dB |
| Connector pairs | 2 × 0.5 dB | 1.0 dB |
| Fusion splices | 4 × 0.1 dB | 0.4 dB |
| Passive components | Not included in this example | 0 dB |
| Total estimated loss | Sum of components | 4.9 dB |
The estimated loss is 4.9 dB. This is an engineering example rather than a universal acceptance limit. Actual attenuation and component allowances must come from the cable, connector, splice, and system specifications.
7. What Is the Difference Between OLTS and OTDR Testing?
OLTS and OTDR are both important fiber testing methods, but they measure different aspects of the link. OLTS measures end-to-end insertion loss, while OTDR analyzes backscattered and reflected light to identify events along the fiber.
| Feature | OLTS / Light Source and Power Meter | OTDR |
|---|---|---|
| Primary purpose | Measure end-to-end insertion loss | Locate and characterize events along the fiber |
| Measurement method | Measures transmitted optical power against a reference | Analyzes backscattered and reflected optical signals |
| Typical results | Total link loss in dB | Fiber length, event location, splice events, reflections, and estimated event loss |
| Connector inspection | End-face inspection is needed for reliable testing | End-face inspection is also needed for reliable testing |
| Best application | Installation acceptance and link loss verification | Fault location and detailed fiber-route diagnosis |
| Limitation | Does not identify the exact location of each loss event | Does not replace an OLTS acceptance measurement where end-to-end insertion loss testing is required |
An OTDR trace can reveal a high-loss connector, a poor splice, a bend, or a suspected break. However, OTDR measurements are based on backscatter analysis and can be affected by launch conditions, event dead zones, and differences in fiber backscatter characteristics.
For this reason, an OLTS or source-and-power-meter test is generally the preferred method for verifying installed cable plant insertion loss. OTDR is a complementary diagnostic tool.
8. Common Problems That Affect Optical Loss Test Results
Inaccurate test results can lead to unnecessary cable replacement or cause a defective link to pass inspection. Several testing conditions should be controlled.
Dirty reference cables: Contaminated reference connectors can introduce additional loss or distort the zero reference.
Incorrect reference method: Using a different reference configuration from the specified test procedure can change the reported result.
Wrong test wavelength: The measured attenuation may not represent the link's intended operating wavelength.
Incompatible reference cables: Reference cables should match the fiber type and connector interfaces required by the test setup.
Unstable light source: Source fluctuations can affect repeatability and measurement accuracy.
Incorrect meter configuration: The wavelength setting, adapter, or measurement range may be unsuitable.
Improper multimode launch conditions: Modal distribution can affect results, so the required launch conditions and mode-control method must be followed.
Unrecorded test conditions: Missing wavelength, reference method, or fiber identification makes results difficult to compare later.
9. How Optical Loss Testing Supports High-Speed Ethernet Networks
As Ethernet speeds increase, fiber links become more dependent on precise optical performance. A small loss variation can reduce available margin, particularly in systems with multiple optical lanes, short-reach parallel interfaces, or tightly specified receiver limits.
Verify the fiber mode, optical standard, connector type, and total path loss. Parallel SR4 and single-mode LR4 links require different cabling arrangements.
Check individual optical lanes, MPO polarity where applicable, and the loss limits of the selected DR, FR, or SR interface.
Validate the complete optical path and connector configuration. Lane-level performance and adequate optical margin are important for reliable operation.
Longer single-mode links may require additional checks for dispersion, OSNR, amplifier performance, and coherent system parameters beyond insertion loss.
10. C-LIGHT Optical Transceivers for Fiber Link Applications
Optical loss testing is an important part of deploying and maintaining high-speed optical transceivers. The selected module must match the fiber type, connector configuration, transmission distance, and optical budget of the link.
Options for different 400G Ethernet optical architectures. Verify the exact optical interface, fiber type, and connector requirements.
For supported high-density networking platforms, with optical configurations selected according to reach and link architecture.
Designed for supported 800G applications where fiber type, lane mapping, and optical power requirements must be validated.
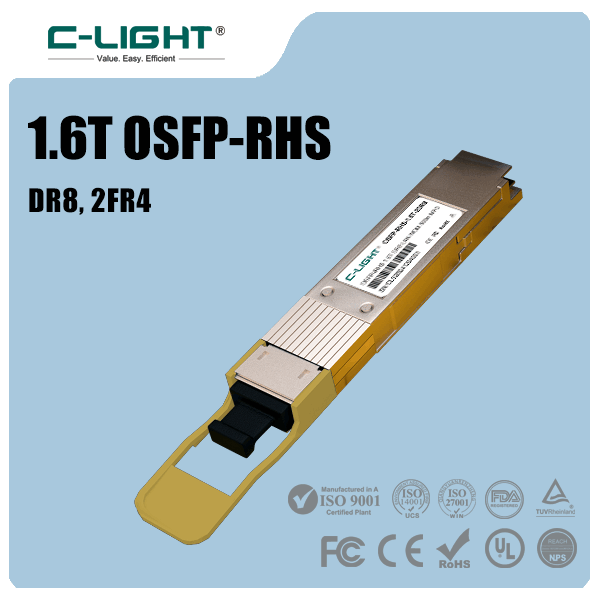
For high-bandwidth data center links, with the specific optical standard determining the required fiber and connector arrangement.
C-LIGHT supports optical transceiver requirements across data center and Ethernet networking applications. When selecting a replacement module or planning a new deployment, confirm the host equipment, optical standard, fiber category, connector, and required reach. These details help ensure that the transceiver and installed fiber link operate within their intended specifications.
11. Conclusion
Testing optical loss is essential for verifying the performance of a fiber link. A calibrated light source and optical power meter or OLTS provide the primary measurement of end-to-end insertion loss, while an OTDR helps locate faults and characterize events along the route.
Reliable results depend on correct wavelength selection, clean connectors, suitable reference cables, a consistent reference method, and accurate documentation. By comparing measured loss with the calculated link budget and the applicable acceptance requirements, engineers can identify excessive attenuation before it affects network operation.
Share your transceiver model, fiber type, link distance, connector configuration, and measured optical power to evaluate the link requirements.
Contact C-LIGHT >

 >
 >
 >
 >
 >
 >
 >