TEL:+86 132 6656 7067





Optical power is one of the most important parameters in transceiver performance. Transmit power determines the optical signal level launched into the fiber, while receive power indicates the signal level reaching the receiving module. Measuring both values helps verify transmitter operation, evaluate link conditions, and identify problems such as excessive fiber loss, poor connections, or insufficient receiver input power.
1. What Are Transmit and Receive Optical Power?
An optical transceiver converts electrical data into optical signals at the transmitting end and converts incoming optical signals back into electrical data at the receiving end. Its optical power is generally evaluated through two parameters: Tx optical power and Rx optical power.
Transmit Optical Power (Tx Power)
Transmit optical power is the optical signal power emitted from the transceiver's transmitter port and coupled into the connected fiber. It indicates the output level of the optical transmitter under specified operating conditions.
Tx power is commonly measured in dBm. A reading that is too low may indicate transmitter degradation, incorrect operating conditions, or a connection problem. A reading above the specified maximum may also be unsuitable for the intended link.
Receive Optical Power (Rx Power)
Receive optical power is the optical signal level arriving at the receiver input. It reflects the combined effects of transmitter output, fiber attenuation, connector losses, splices, and other components along the optical path.
The receiver must receive a signal within its specified operating range. If the power is too low, the receiver may experience a higher error rate or lose the link. If the power is too high, the receiver may be overloaded.
| Parameter | Tx Optical Power | Rx Optical Power |
|---|---|---|
| Meaning | Optical power transmitted from the module. | Optical power arriving at the receiver. |
| Measurement location | Transmitter output port. | Receiver input side. |
| Primary purpose | Evaluates transmitter output performance. | Evaluates received signal level. |
| Common measurement tools | Optical power meter or DOM/DDM. | Optical power meter or DOM/DDM. |
| Important limits | Specified minimum and maximum output power. | Receiver sensitivity and maximum input power. |
2. What Equipment Is Needed for Optical Power Testing?
An optical power meter is the primary instrument for directly measuring optical power. The measurement setup also requires suitable fiber patch cords, connector adapters, and cleaning equipment.
| Equipment | Function | Key Requirement |
|---|---|---|
| Optical Power Meter | Measures absolute optical power. | Must support the operating wavelength and expected power range. |
| Reference Fiber Patch Cord | Connects the transceiver to the meter. | Correct fiber type, connector, and compatible optical interface. |
| Optical Connector Adapter | Provides the required physical connection. | Must match the connector interface and end-face geometry. |
| Fiber Inspection and Cleaning Tools | Inspect and clean connector end faces. | Suitable for the connector type and inspection procedure. |
| Optical Attenuator | Reduces optical power in a controlled manner. | Useful for receiver input and overload testing. |
| Host Switch or Test Platform | Powers the transceiver and provides operating data. | Supports the module and its required operating configuration. |
Before testing, confirm that the power meter is calibrated, its detector covers the required wavelength and power range, and the selected adapter matches the transceiver connector. A meter configured for the wrong wavelength can produce an inaccurate reading.
3. How Do You Test Transmit Optical Power?
Tx power is measured by connecting the transceiver's optical output directly to an optical power meter through a suitable reference patch cord. The measurement should be made under the operating conditions specified for the module.
Tx measurement: connect the transmitter output to the optical power meter.
Tx Power Measurement Procedure
Check the module specifications: Identify the transceiver's operating wavelength, connector type, and specified Tx power range.
Install the transceiver: Insert the module into a compatible host device or test platform and establish its normal operating condition.
Prepare the power meter: Turn on the meter, allow it to stabilize according to the manufacturer's instructions, and select the correct wavelength and dBm measurement mode.
Inspect and clean connectors: Check the transceiver port, patch cord, and meter adapter. Clean and reinspect them when necessary.
Connect the Tx output: Connect the transceiver's transmitting optical port to the power meter using a suitable reference patch cord.
Wait for a stable reading: Allow the transmitter and measurement setup to reach a stable condition.
Record the result: Record the optical power reading and compare it with the transmitter's specified minimum and maximum values.
For repeatable laboratory measurements, multiple readings should be taken using a consistent connection and measurement procedure. IEC 61280-1-1 describes a transmitter output power measurement method for single-mode fiber systems, including connector inspection, test-cord requirements, stable readings, and averaging.
4. How Do You Test Receive Optical Power?
Rx power is measured at the receiver input. To obtain a direct measurement, disconnect the incoming fiber from the receiving transceiver and connect that fiber to the optical power meter. The meter then measures the optical power arriving from the remote transmitter through the installed optical path.
Rx measurement: disconnect the receiver-side fiber and connect it to the power meter.
Rx Power Measurement Procedure
Identify the receiving port: Confirm the correct optical port and the expected wavelength of the incoming signal.
Prepare the optical power meter: Select the matching wavelength and dBm mode.
Inspect and clean the connector: Check the fiber end face and meter adapter before making the connection.
Disconnect the incoming fiber: Remove the fiber connector from the transceiver's Rx port. This may interrupt the live link.
Connect the meter: Attach the incoming fiber to the optical power meter using a compatible adapter.
Record the reading: Allow the value to stabilize and record the received optical power.
Compare with the receiver specifications: Check whether the measured value is between the receiver's sensitivity and maximum input power limits.
This measurement represents the power arriving at the receiver-side fiber connector. It is not necessarily identical to the receiver's internal DOM/DDM reading because the latter is measured by the transceiver's internal monitoring circuitry and may have its own measurement tolerance.
5. How Do You Check Tx and Rx Power Through DOM or DDM?
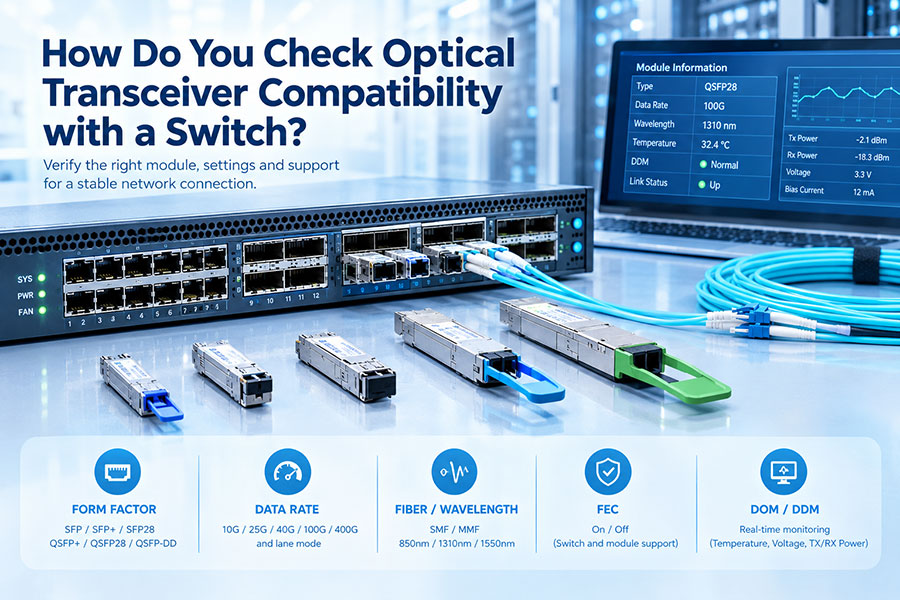
Many optical transceivers support Digital Optical Monitoring (DOM), also known as Digital Diagnostic Monitoring (DDM). This feature provides operating information through the host device's management interface.
Depending on the module and host platform, diagnostic information may include:
Tx optical power: Internally monitored transmitter output power.
Rx optical power: Internally monitored received optical power.
Temperature: Internal module temperature.
Supply voltage: Module operating voltage.
Laser bias current: Transmitter laser operating current.
DOM/DDM allows network operators to monitor optical power without disconnecting the fiber. This is particularly useful for checking link conditions during normal operation and identifying changes over time.
Example: Reading Optical Power on a Switch
On supported Cisco platforms, a command such as the following can display transceiver diagnostic information:
show interfaces transceiver detail
The exact command and output fields vary by switch operating system, platform, and transceiver type. Other vendors provide their own commands or management interfaces for displaying optical diagnostics.
| Monitoring Method | Advantages | Limitations |
|---|---|---|
| Optical Power Meter | Direct measurement of optical power at the connected fiber point. | Requires physical access and usually disconnecting the optical connection being measured. |
| DOM/DDM | Provides convenient real-time diagnostic readings without disconnecting the link. | Accuracy and supported parameters depend on the module and monitoring implementation. |
| Host Management System | Supports monitoring across multiple ports and devices. | Depends on platform support, software, and available diagnostic data. |
DOM/DDM values are useful for operational monitoring, but they should not automatically be treated as laboratory-grade measurements. When precise optical power verification is required, use a calibrated optical power meter and compare its reading with the module specification.
6. How Do You Interpret Optical Power Readings in dBm?
Optical power is commonly expressed in dBm, which represents power relative to 1 milliwatt. It is a logarithmic unit, so a change of 3 dB corresponds to approximately a factor of two in optical power.
| Optical Power | Approximate Linear Power | Interpretation |
|---|---|---|
| 0 dBm | 1 mW | Reference level of 1 milliwatt. |
| -3 dBm | 0.50 mW | Approximately half of 1 mW. |
| -10 dBm | 0.10 mW | One-tenth of 1 mW. |
| -20 dBm | 0.01 mW | 10 microwatts. |
| -30 dBm | 0.001 mW | 1 microwatt. |
A more positive dBm value represents higher optical power, while a more negative value represents lower optical power. However, a higher reading is not always better: the receiver must operate within its specified input range.
7. How Do You Determine Whether Tx and Rx Power Are Normal?
Measured power should be compared with the specifications of the exact transceiver model and optical application. There is no universal Tx or Rx power range that applies to every SFP, SFP28, QSFP28, QSFP-DD, OSFP, or other optical module.
For Tx power, check the specified transmitter output range. For Rx power, check both receiver sensitivity and maximum receiver input power.
| Measured Condition | Possible Meaning | Recommended Investigation |
|---|---|---|
| Tx power below minimum | Low transmitter output or a measurement-path issue. | Verify the meter setup, connector condition, operating state, and module specification. |
| Tx power above maximum | Output may exceed the specified transmitter range. | Confirm the measurement wavelength, calibration, and module operating conditions. |
| Rx power below sensitivity | Received signal may be insufficient for reliable detection. | Investigate fiber loss, connectors, patch cords, and remote transmitter output. |
| Rx power above maximum input | Receiver may be overloaded. | Check link design and whether suitable attenuation is required. |
| Power fluctuates significantly | Possible unstable connection, transmitter variation, or measurement issue. | Inspect connectors, verify patch-cord condition, and repeat the measurement. |
Example of an Rx Power Check
Assume a transceiver datasheet specifies a receiver operating range of -18 dBm to -3 dBm. If the measured Rx power is -10 dBm, the reading falls within that stated range.
If the measured value is -22 dBm, it is below the specified receiver sensitivity. If the reading is -1 dBm, it is above the stated maximum input level. These examples are illustrative only; actual limits must be taken from the exact product datasheet.
8. What Is the Relationship Between Tx Power, Rx Power, and Optical Link Loss?
Comparing transmitter output power with receiver input power provides an estimate of the total optical loss across a link, provided both measurements refer to the same optical path and are taken under comparable conditions.
For example, if the transmitter output is -2 dBm and the receiver input is -8 dBm:
This indicates an approximately 6 dB reduction in optical power between the two measurement points.
The result can help evaluate the combined loss from fiber attenuation, connectors, splices, and other passive components. It should not be confused with the optical power budget, which is the allowable loss supported by the transmitter and receiver specifications.
9. Common Mistakes During Optical Power Testing
Incorrect measurement practices can produce misleading readings and lead to unnecessary component replacement. The following issues should be considered during testing:
Incorrect wavelength selection: The power meter must be configured for the actual transmitter wavelength.
Dirty connector end faces: Dust or contamination can introduce additional loss or unstable readings.
Wrong fiber or connector type: The test cord and adapters must match the optical interface.
Ignoring measurement stability: A single fluctuating reading may not represent normal transmitter performance.
Confusing dB with dBm: dBm represents absolute optical power, while dB represents a relative difference or loss.
Relying only on DOM/DDM: Internal monitoring values may have measurement tolerances and should be cross-checked when precise verification is needed.
Ignoring receiver overload: A receiver can experience problems when input power is higher than its specified maximum.
Comparing unrelated specifications: Power limits must correspond to the exact module model, wavelength, and application.
10. Optical Power Testing for 400G and 800G Transceivers
High-speed optical transceivers often use multiple optical lanes or wavelength channels. Their optical power specifications may be expressed as per-lane values, per-channel values, or aggregate module power, depending on the interface architecture and datasheet.
For these modules, engineers should confirm exactly what the specification describes before comparing it with a meter reading. A measurement of combined optical output is not necessarily equivalent to a single-lane power specification.
| Test Consideration | Engineering Requirement |
|---|---|
| Lane configuration | Identify the number of optical lanes and whether the specification is per lane or aggregate. |
| Wavelength | Confirm the wavelength or wavelength range for each optical channel. |
| Measurement equipment | Use a meter or analyzer that supports the required wavelength, power range, and measurement method. |
| Connector interface | Use the correct fiber type, connector, and test adapter. |
| DOM/DDM monitoring | Check whether the module reports lane-specific or aggregate diagnostic values. |
| Receiver performance | Compare input power with the receiver sensitivity and overload limits for the specific interface. |
C-LIGHT offers high-speed connectivity products for data center applications, including 800G AOC cables, 800G DAC cables, and 800G AEC cables. These products use different transmission architectures, so their optical or electrical test requirements should be selected according to the product design and applicable specifications.
11. Conclusion
Testing transmit and receive optical power is a fundamental part of optical transceiver validation and network troubleshooting. A calibrated optical power meter provides direct measurements of Tx output and Rx input power, while DOM/DDM offers convenient monitoring during normal network operation.
Accurate results depend on correct wavelength selection, clean connectors, compatible test cords, stable operating conditions, and comparison with the exact module specifications. By evaluating Tx power, Rx power, receiver limits, and total link loss together, engineers can identify optical power problems and assess whether a link is operating within its designed performance range.
C-LIGHT provides optical transceivers and high-speed interconnect products for data center and network applications. For product specifications, optical performance requirements, or technical support, Contact C-LIGHT.
 >

 >
 >
 >
 >
 >
 >
 >