TEL:+86 132 6656 7067





High-speed data center networks increasingly use OSFP optical transceivers for 400G and 800G connectivity. Their installation requires more than inserting a module into an available port. Engineers must verify the host platform, optical interface, power requirements, cooling design, and fiber configuration before bringing the link online. Correct handling also protects the module's electrical contacts and optical interfaces from electrostatic discharge and contamination.
The following procedure covers the main steps for installing an OSFP optical transceiver in a compatible switch, router, or other network device. Always follow the hardware manufacturer's instructions when they differ from the general procedure below.
1. Check OSFP Module and Host Compatibility
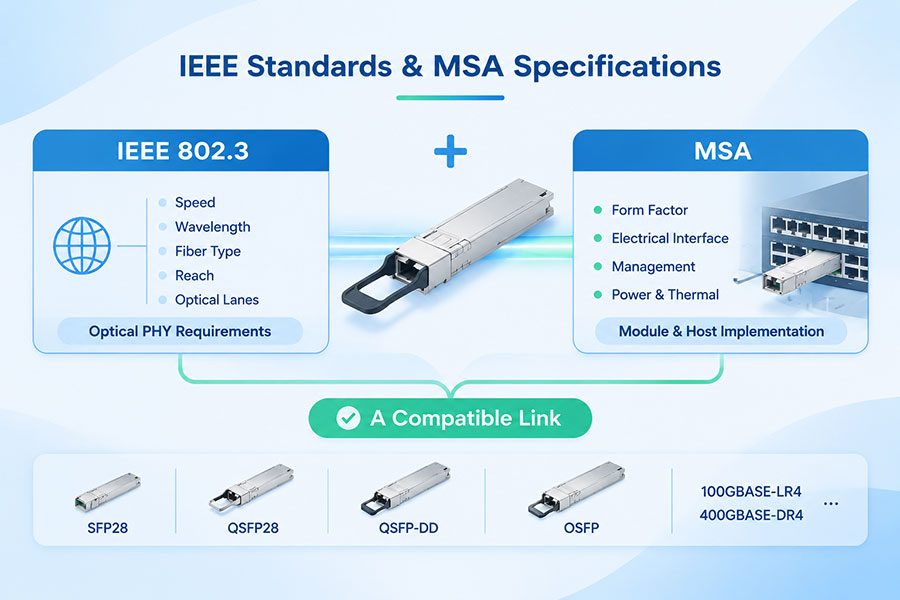
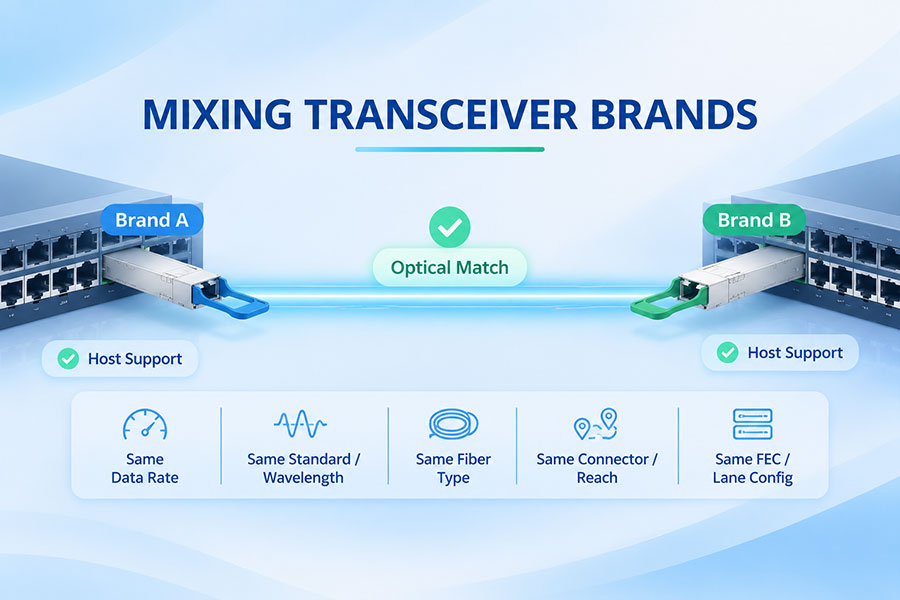
Before installation, confirm that the OSFP transceiver matches the host equipment and intended network connection. The OSFP form factor alone does not guarantee compatibility. Supported data rates, optical standards, electrical interfaces, firmware, power limits, and thermal requirements can vary between platforms.
| Compatibility Item | What to Verify |
|---|---|
| Form factor | Confirm that the equipment has an OSFP cage rather than a QSFP-DD or another module interface. |
| Data rate | Verify support for the module's operating rate, such as 400G or 800G. |
| Optical standard | Check the supported application, such as SR8, DR8, 2DR4, FR4, or another specified interface. |
| Wavelength | Confirm that the transmitting and receiving wavelengths match the remote optical interface. |
| Fiber type | Determine whether the connection requires multimode fiber (MMF) or single-mode fiber (SMF). |
| Connector | Check the required connector, such as MPO/MTP or duplex LC, and the applicable polarity. |
| Power and cooling | Verify the host's supported module power and the airflow or cooling requirements. |
| Management compatibility | Check module coding, firmware, CMIS support, and the platform's qualified transceiver list. |
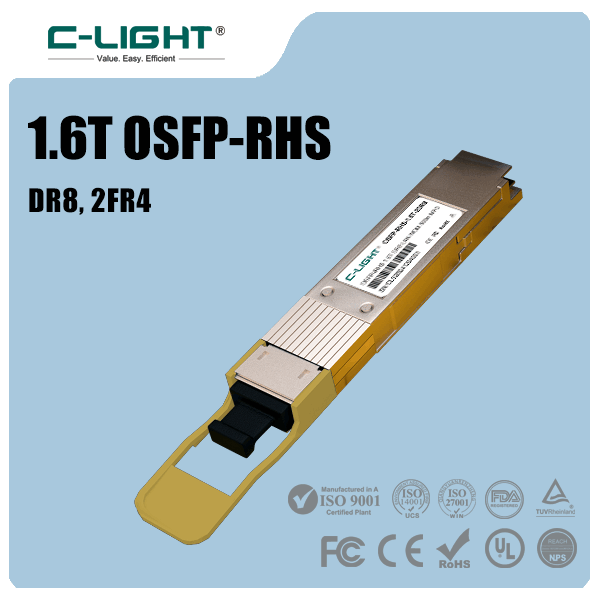
OSFP modules are available in different optical configurations. For example, an 800G OSFP DR8 module and an 800G OSFP 2FR4 module do not use the same optical connection arrangement. The correct fiber type, connector, and remote module must be selected according to the specific product specification.
For product options, see C-LIGHT's 400G OSFP optical transceivers and 800G OSFP optical transceivers.
2. Prepare the Installation Tools and Work Area
Prepare the required equipment before handling the transceiver. A clean, static-controlled work area helps prevent damage during installation and reduces the risk of optical contamination.
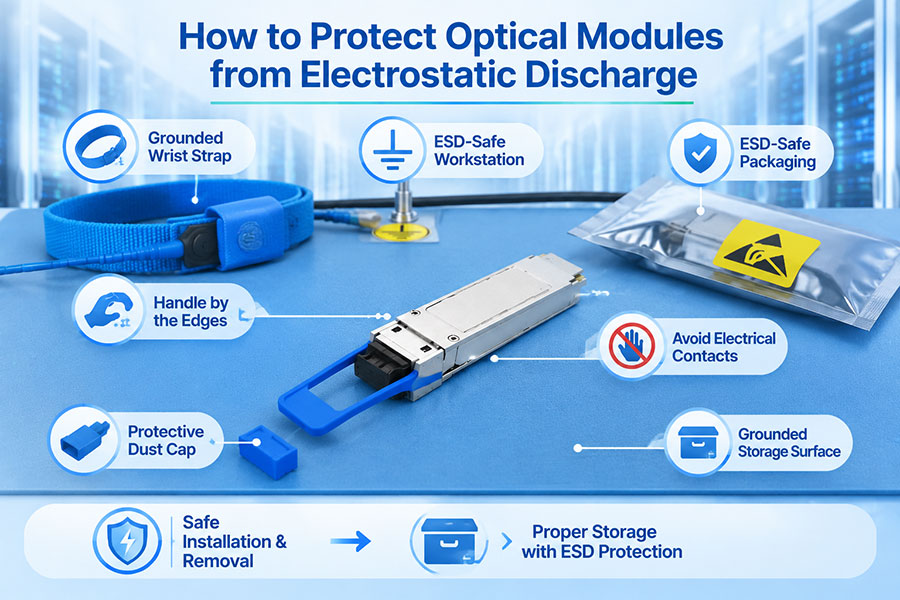
ESD wrist strap: Use a properly grounded wrist strap or another approved personal grounding device.
Antistatic surface: Keep spare modules on an antistatic mat or in their original protective packaging.
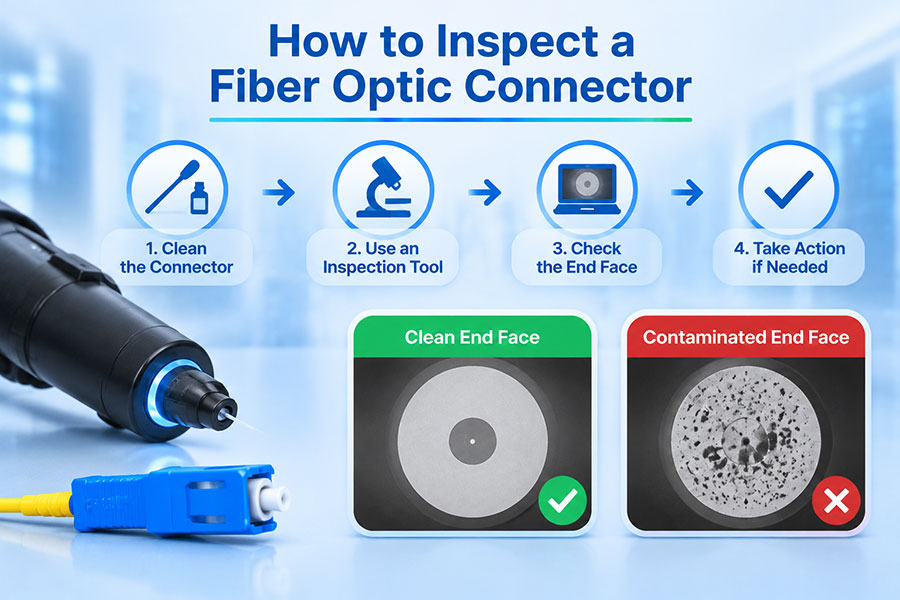
Fiber inspection equipment: Use an appropriate fiber inspection microscope or inspection probe.
Fiber cleaning tools: Prepare compatible cleaning tools for the connector type.
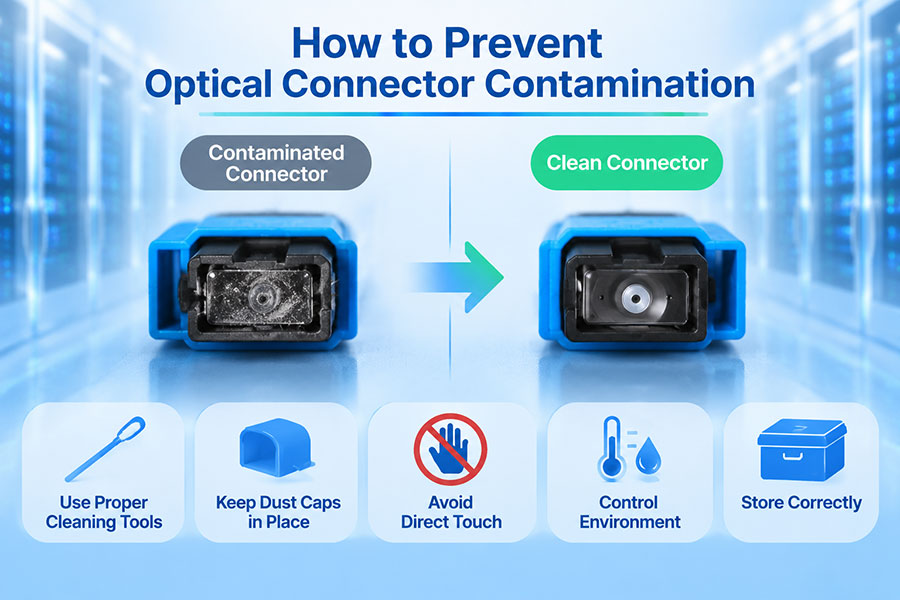
Protective dust caps: Keep clean caps available for unused optical ports and fiber connectors.
Network documentation: Have the port assignment, module specification, and host installation guide available.
OSFP transceivers contain sensitive electronic components. Avoid touching the electrical contacts or optical connector end faces. Handle the module by its housing or designated pull tab.
3. Inspect the OSFP Transceiver Before Insertion
Remove the module from its antistatic packaging and check its product label. Confirm the model number, data rate, optical standard, wavelength, fiber type, and connector against the installation plan.
Inspect the module housing for visible damage. Check that the pull tab and locking mechanism are intact and that the optical interface is protected by its dust plug. Do not remove the dust plug until the fiber connection is ready.
Also check the host port for dust, physical damage, or obstructions. If the port is unused and covered by a protective insert, remove it according to the equipment manufacturer's instructions and retain it for future use.
4. Insert the OSFP Module into the Host Port
Once compatibility and physical inspection are complete, install the OSFP transceiver in the designated cage. Many OSFP modules use a pull-tab mechanism and a locking arrangement designed to secure the module in the host connector.
Confirm the correct port using the host device's port map or installation documentation.
Attach the ESD wrist strap to an approved grounding point.
Hold the OSFP module by its housing or pull tab. Avoid touching the electrical contacts.
Orient the module according to the port and module alignment features. Keep the pull tab in the position specified by the equipment manufacturer.
Align the module with the OSFP cage and slide it straight into the opening.
Apply steady, controlled pressure until the module is fully seated and its retention mechanism engages.
Check that the module is secure and does not sit partially outside the cage.
Do not force the module into the port. If it encounters unusual resistance, withdraw it carefully and check the orientation, cage condition, and module alignment. Forcing an incorrectly aligned module can damage the host connector or module contacts.
Some OSFP designs and host platforms use different mechanical retention or heatsink arrangements. The exact insertion and locking procedure should therefore follow the equipment-specific installation guide.
5. Connect the Fiber-Optic Cable
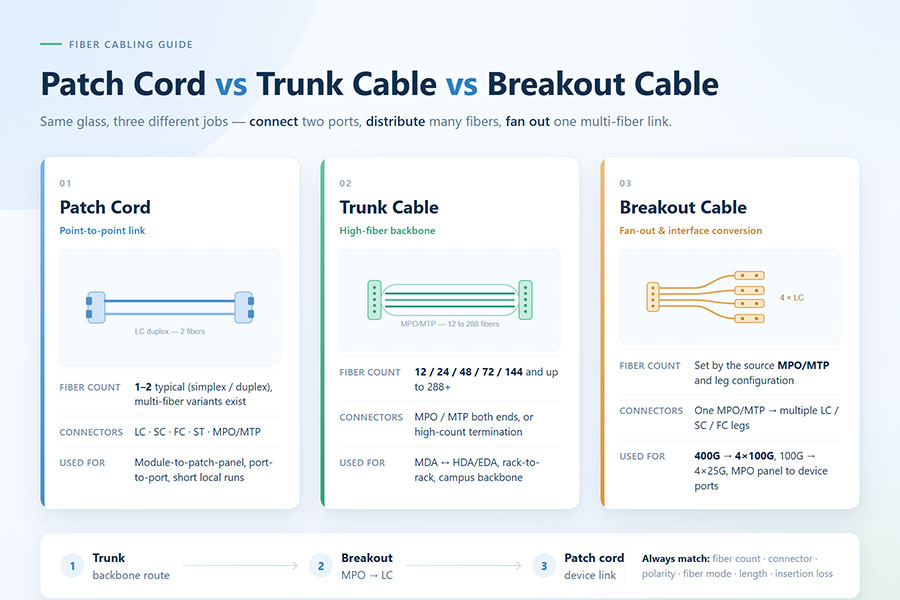
After the module is fully seated, prepare the optical cable. The cable must match the transceiver's optical interface, connector type, fiber category, and transmission distance.
Identify the correct cable type and confirm that it matches the local and remote transceivers.
Remove the cable's protective caps only when ready to make the connection.
Inspect the connector end faces using suitable inspection equipment.
Clean the connectors when necessary, following the applicable cleaning procedure.
Remove the OSFP module's dust plug when the fiber connection is ready.
Align the connector with the module's optical receptacle and insert it carefully.
Check that the connector is fully seated and that the cable is routed without excessive bending or tension.
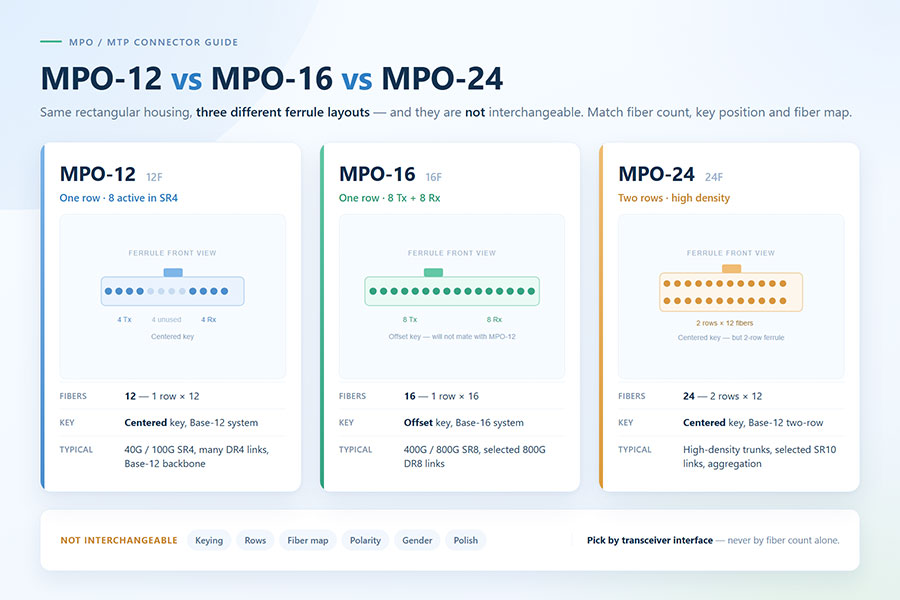
Connector arrangements depend on the optical standard. For example, many 400G and 800G parallel-optics implementations use MPO/MTP connections, while some wavelength-division multiplexing interfaces use duplex LC connectors. Always check the specific module datasheet rather than assuming that all OSFP modules use the same connector.
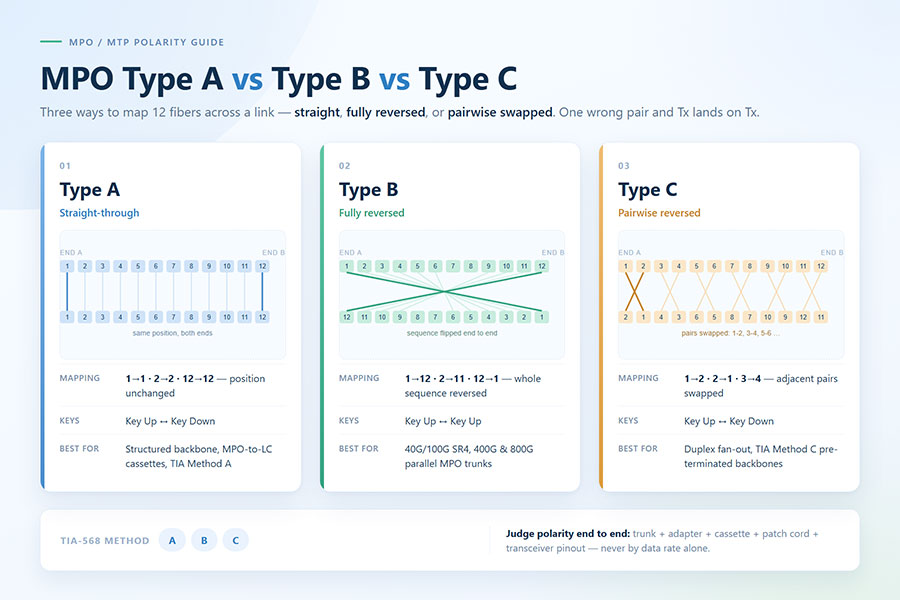
For MPO/MTP connections, verify the required polarity and fiber mapping at both ends. For duplex LC connections, check transmit-to-receive alignment between the two devices. Incorrect polarity can prevent the link from establishing even when both modules are otherwise compatible.
6. Verify Module Recognition and Link Status
Once the transceiver and fiber cable are connected, check the host device to confirm that the module is recognized and operating correctly. The exact commands vary by switch operating system and hardware platform.
Typical checks include:
Module recognition: Confirm that the host identifies the OSFP module and reports the expected model or vendor information.
Interface status: Check whether the port is administratively enabled and operationally up.
Optical diagnostics: Review supported digital diagnostic monitoring (DDM/DOM) or CMIS telemetry values.
Transmit power: Check that the module reports a reasonable transmit optical power level.
Receive power: Confirm that the received optical power is within the module's specified operating range.
Temperature and voltage: Review available module telemetry and compare readings with the product specifications.
Error counters: Check for increasing CRC errors, symbol errors, FEC corrections, or other interface-level indicators.
A recognized module does not necessarily mean that the optical link is functioning correctly. Both ends must support compatible optical standards, and the fiber connection must meet the relevant optical power and polarity requirements.
7. Check Cooling and Operating Conditions
OSFP modules are used in high-bandwidth applications where power consumption and heat dissipation can be significant. Their operating temperature depends on the module design, host cage, heatsink arrangement, and chassis airflow.
After installation, verify the following conditions:
The module's heatsink and thermal interface are correctly positioned according to the host design.
Airflow direction matches the chassis cooling configuration.
Nearby modules and cables do not obstruct the airflow path.
Module temperature remains within the manufacturer's specified operating range.
The host supports the module's power class and thermal requirements.
Do not assume that an OSFP module supported by one switch model will operate within the thermal limits of another. High-density 800G systems can have platform-specific cooling requirements, making the host compatibility list and installation guide important references.
8. Troubleshoot Common OSFP Installation Problems
If the OSFP module is not recognized or the optical link remains down, check the physical installation and configuration before replacing components.
| Problem | Possible Cause | Recommended Check |
|---|---|---|
| Module not detected | Incomplete insertion, incompatible module, or host support issue. | Reseat the module according to the host guide and verify platform compatibility. |
| Module detected but link down | Remote interface mismatch, incorrect fiber connection, or disabled port. | Check both endpoints, interface configuration, and cable connections. |
| Low receive optical power | Dirty connectors, excessive fiber loss, incorrect polarity, or unsuitable fiber. | Inspect and clean connectors, verify the optical path, and review receive-power readings. |
| High error rate | Optical signal degradation, fiber issues, or incompatible link settings. | Review optical power, FEC status, lane diagnostics, and interface counters. |
| Module temperature warning | Insufficient airflow, unsuitable cooling, or operation outside the specified conditions. | Check chassis airflow, heatsink arrangement, and module temperature telemetry. |
| Module rejected by host | Unsupported coding, firmware restrictions, or platform qualification limitations. | Check the host compatibility documentation and module management information. |
When troubleshooting, change one variable at a time where practical. This makes it easier to identify whether the problem originates from the module, host port, fiber cable, remote transceiver, or network configuration.
9. OSFP Installation Checklist
Before placing the connection into service, confirm that the following steps have been completed:
Host port and OSFP module compatibility verified.
Data rate, optical standard, wavelength, and fiber type confirmed.
ESD protection used during handling.
Module inspected and correctly seated in the cage.
Retention mechanism fully engaged.
Fiber connector inspected and cleaned where necessary.
Connector type and fiber polarity verified.
Module recognized by the host device.
Transmit and receive optical power checked.
Temperature, airflow, and interface error counters reviewed.
10. Conclusion
Installing an OSFP optical transceiver requires careful compatibility checks, ESD protection, correct module alignment, clean fiber connections, and post-installation verification. These steps help prevent physical damage and reduce the likelihood of link failures in high-speed data center networks.
For 400G and 800G deployments, the installation process should also account for optical lane configuration, host power support, module management compatibility, and thermal design. Selecting the correct OSFP module for both ends of the connection is just as important as installing it correctly.
C-LIGHT provides 400G and 800G OSFP optical transceiver solutions for high-speed Ethernet and data center applications. For module specifications, compatibility requirements, or deployment assistance, Contact C-LIGHT.
 >

 >
 >
 >
 >
 >
 >
 >