TEL:+86 132 6656 7067





Connecting two optical transceivers establishes a fiber-optic communication link between network devices such as switches, routers, servers, and storage systems. Although the physical connection may involve only a fiber patch cable, successful communication depends on several factors: transceiver compatibility, transmission and reception wavelengths, fiber type, connector configuration, and optical signal levels.
The two transceivers are normally installed in compatible ports at opposite ends of the link. A suitable fiber cable then connects their optical interfaces. The correct connection method depends on whether the modules use duplex fiber, a single-fiber BiDi interface, or a parallel-optics connector such as MPO/MTP.
1. Understand the Basic Optical Transceiver Connection
An optical transceiver converts electrical signals from network equipment into optical signals for transmission through fiber. At the receiving end, another transceiver converts the incoming optical signal back into an electrical signal.
In a typical duplex optical link, each transceiver has a transmit (Tx) and receive (Rx) optical path. The transmitter at one end must connect to the receiver at the other end, while the reverse path carries traffic in the opposite direction.
The complete connection normally consists of these components:
Two compatible network devices with supported optical ports.
Two optical transceivers with matching link specifications.
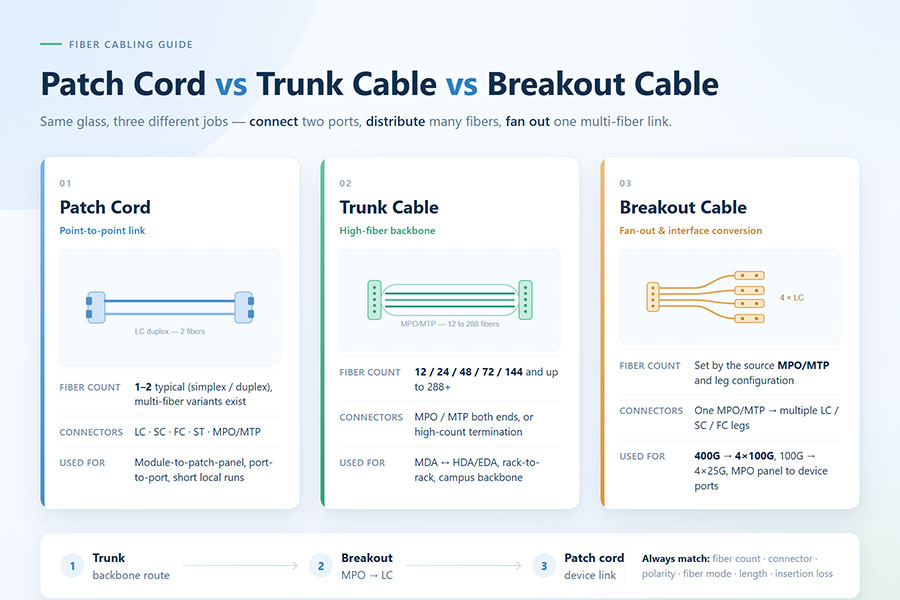
A fiber-optic patch cable compatible with both optical interfaces.
Additional patch panels or structured cabling, when required by the network layout.
2. Check Compatibility Between the Two Transceivers
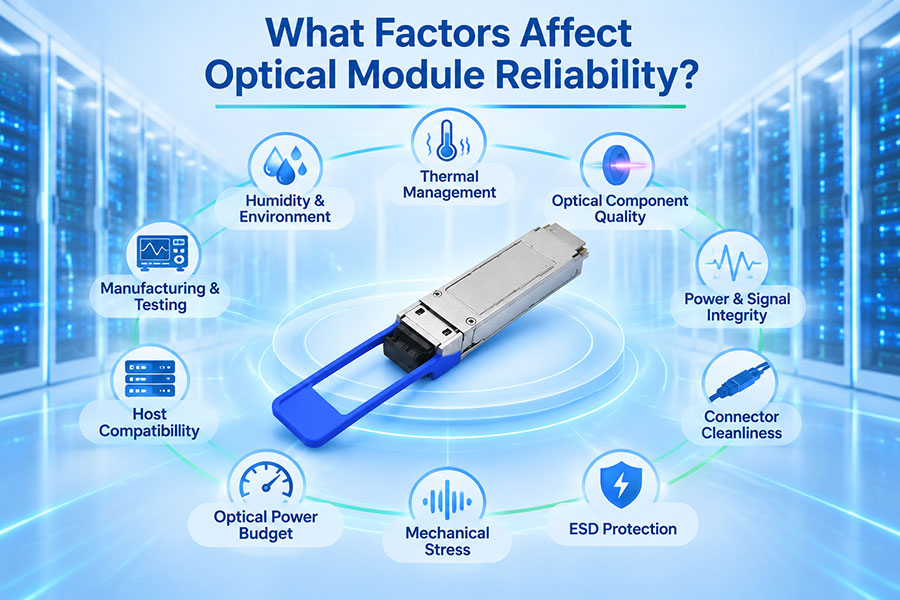
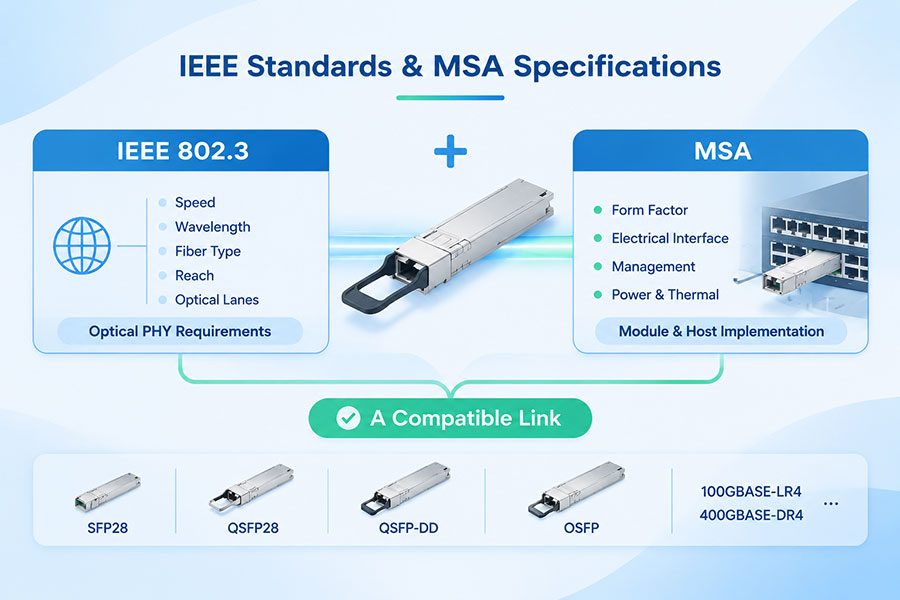
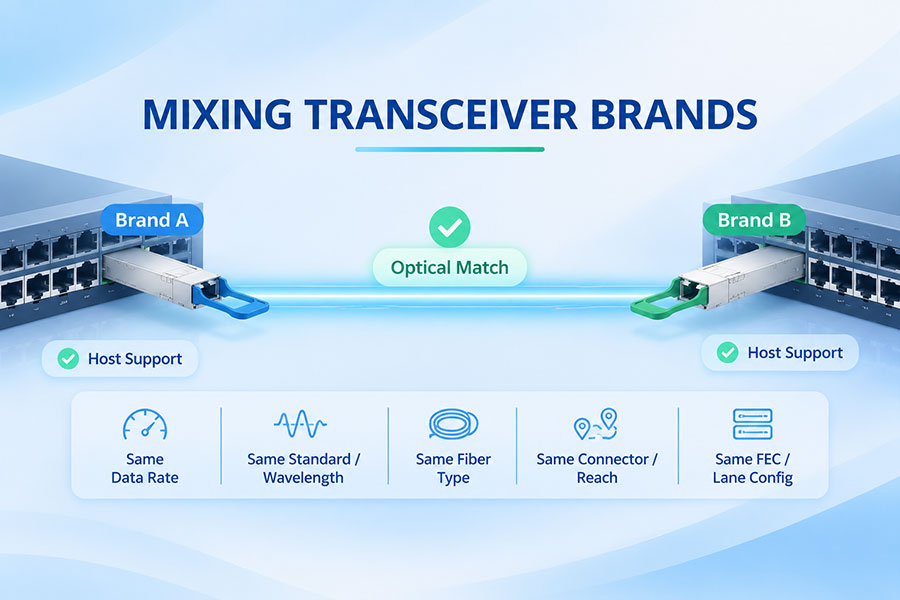
Before connecting the fiber, verify that both transceivers are designed to communicate with each other. Matching connector types alone is not sufficient. Their optical standards, transmission rates, wavelengths, fiber requirements, and link distances must be compatible.
| Compatibility Factor | What to Check |
|---|---|
| Data rate | Confirm that both endpoints support the same link rate and compatible lane architecture. |
| Optical standard | Check the application specification, such as 10GBASE-SR, 100GBASE-LR4, or 400GBASE-DR4. |
| Wavelength | Verify that the transmitting wavelength at one end is supported by the receiving interface at the other end. |
| Fiber type | Match multimode fiber (MMF) or single-mode fiber (SMF) to the module specifications. |
| Connector type | Confirm LC, SC, MPO/MTP, or another required connector interface. |
| Transmission distance | Ensure the fiber route is within the supported reach of both transceivers. |
| Optical power budget | Check that the link loss is within the transmitter and receiver specifications. |
| Host compatibility | Verify that each module is supported by its local switch, router, or server. |
For many standard duplex applications, the two modules use the same optical standard. However, this is not a universal rule. Certain interoperable interfaces and BiDi solutions use different but complementary optical configurations. Always verify the specified interoperability requirements rather than relying only on product labels.
3. Select the Correct Fiber-Optic Cable
The fiber cable must match the optical interface at both ends. Using the wrong fiber type or connector can prevent the link from operating or cause excessive insertion loss.
| Transceiver Application | Typical Fiber Type | Common Connector |
|---|---|---|
| 1G/10G SR | Multimode fiber | LC duplex |
| 10G LR | Single-mode fiber | LC duplex |
| 25G SR | Multimode fiber | LC duplex |
| 100G CWDM4 | Single-mode fiber | LC duplex |
| 100G DR | Single-mode fiber | MPO-12 or specified connector arrangement |
| 400G DR4 | Single-mode fiber | MPO-12 |
| 400G FR4 | Single-mode fiber | LC duplex |
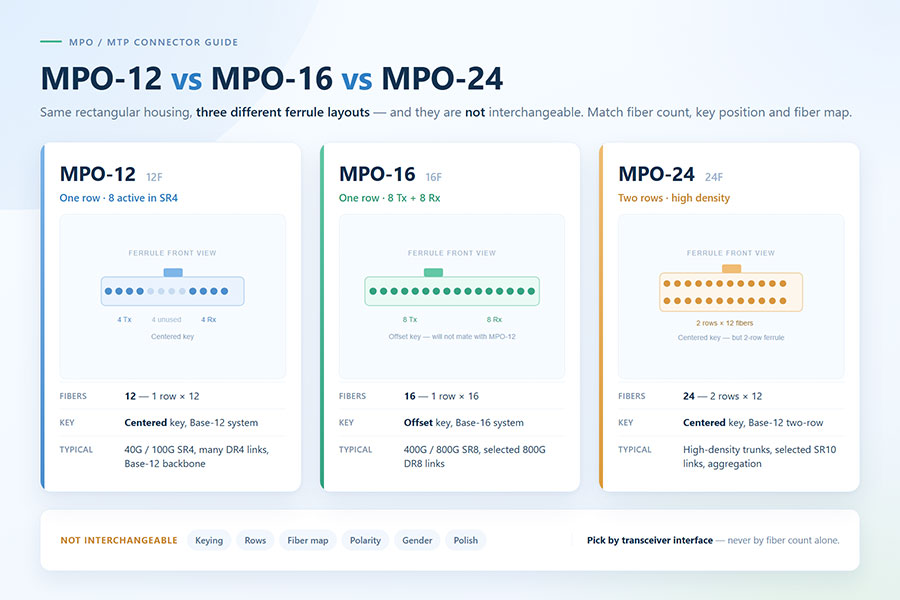
| 800G DR8 | Single-mode fiber | MPO-16 or specified connector arrangement |
These are common examples rather than universal connector rules. Connector arrangements can vary by product implementation and optical standard. Always check the module datasheet for the exact fiber and connector requirements.
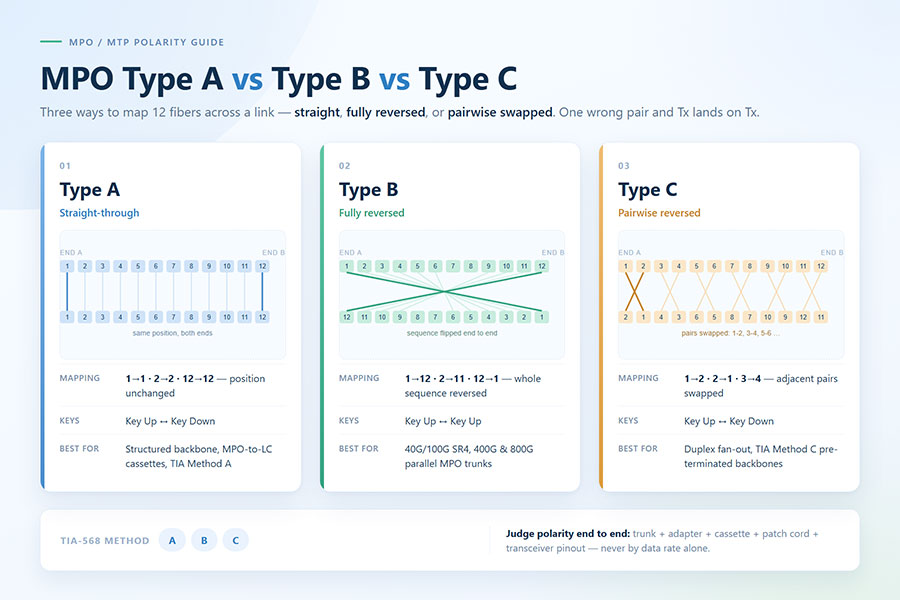
For higher-speed parallel-optics applications, the cable must also support the required optical lane mapping. An MPO/MTP connector with the wrong fiber count or polarity may not establish a working link, even when it physically fits the transceiver.
4. Connect Two Transceivers Using Duplex LC Fiber
Duplex LC fiber is widely used for optical interfaces that transmit and receive over two separate fiber strands. It is common in many 10G, 25G, 100G, and certain 400G optical applications.
A typical duplex connection follows this arrangement:
| Local Transceiver | Fiber Connection | Remote Transceiver |
|---|---|---|
| Tx | Fiber strand 1 | Rx |
| Rx | Fiber strand 2 | Tx |
Follow these steps:
Confirm that both transceivers support the same optical application and are installed in compatible host ports.
Select a duplex LC patch cable with the correct fiber type and appropriate length.
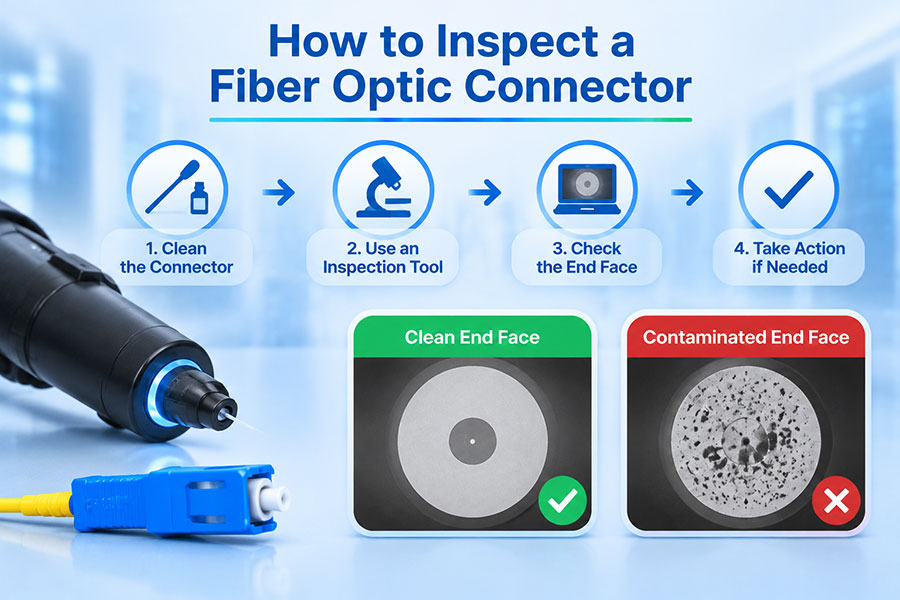
Inspect both connector end faces using suitable fiber inspection equipment.
Clean the connectors if necessary using approved fiber-cleaning tools.
Connect one end of the duplex cable to the first transceiver.
Connect the opposite end to the second transceiver.
Verify that the cable maintains Tx-to-Rx polarity across the complete link.
Check the interface status and optical diagnostics on both devices.
If the link remains down, incorrect polarity is one of the first physical-layer conditions to investigate. The duplex fiber arrangement must provide a transmit-to-receive path in both directions.
5. Connect Two BiDi Optical Transceivers
BiDi (bidirectional) optical transceivers use different wavelengths to transmit and receive signals over a single fiber strand. Unlike conventional duplex modules, a BiDi link does not require two separate fibers for the two transmission directions.
BiDi transceivers generally operate in complementary pairs. The transmit wavelength of one module must match the receive wavelength of the other module, and vice versa.
| Endpoint | Transmit Wavelength | Receive Wavelength |
|---|---|---|
| Module A | 1310 nm | 1490 nm |
| Module B | 1490 nm | 1310 nm |
The wavelengths in this example illustrate a complementary pairing. Actual BiDi wavelength combinations vary by product and data rate.
To establish a BiDi connection:
Confirm that the two modules are specified as a compatible wavelength pair.
Verify that both modules support the same data rate and transmission distance.
Select a single-mode fiber patch cable with the connector specified by the modules.
Inspect and clean the connector end faces before connection.
Connect the two modules through the single fiber strand.
Check received optical power and link status at both endpoints.
Connecting two BiDi modules with identical transmit and receive wavelength configurations may result in an incompatible optical link. Always check the A/B or complementary wavelength designation in the product documentation.
6. Connect Parallel-Optics Transceivers Using MPO/MTP
High-speed optical interfaces such as 100G, 400G, and 800G parallel optics can use multiple transmit and receive lanes. These interfaces often require MPO/MTP connectors to carry several optical channels through a single connector assembly.
Unlike a conventional duplex LC cable, an MPO/MTP connection carries multiple fibers. The correct fiber count, connector gender, key orientation, and polarity method must match the transceiver specification.
For example, a parallel single-mode optical interface may use separate fiber groups for transmitting and receiving. The exact lane assignments depend on the optical standard and module design.
Important checks include:
Confirm the required MPO/MTP fiber count, such as 12 or 16 fibers.
Verify connector gender and pin configuration where applicable.
Use the correct polarity method specified for the link.
Confirm the optical lane mapping at both transceivers.
Check whether the application requires a direct MPO/MTP patch cable or a breakout arrangement.
Ensure that the fiber type and connector polish match the module requirements.
Some parallel-optics links require a crossover arrangement to align transmit and receive lanes. The required polarity is application-specific, so a cable should not be selected solely because its connector fits both modules.
7. Verify the Optical Link After Connection
After connecting the two transceivers, check whether the host devices recognize the modules and whether the optical link is operational. A physically connected fiber cable does not guarantee that the link has been established.
Useful verification items include:
Module recognition: Confirm that both devices detect the installed transceivers.
Interface status: Check whether both network ports report an operational link.
Transmit optical power: Review the Tx power reported by each module.
Receive optical power: Confirm that each receiver reports a signal within its specified operating range.
Temperature and voltage: Review available DDM/DOM or CMIS diagnostic readings.
Lane status: For parallel optics, check individual lane status and diagnostics when supported.
Error counters: Monitor CRC errors, symbol errors, FEC statistics, and other interface indicators.
Optical power readings should be compared with the specific module datasheet. A receiver may detect light but still experience poor link performance if the signal level, lane quality, or error rate is outside the acceptable range.
8. Troubleshoot Common Optical Transceiver Connection Problems
If two transceivers fail to establish a link, check the physical connection and configuration systematically. The following table lists common causes and practical checks.
| Problem | Possible Cause | Recommended Check |
|---|---|---|
| Link remains down | Incorrect fiber polarity, incompatible modules, or disabled ports. | Verify the optical standard, Tx/Rx paths, port configuration, and module compatibility. |
| No receive optical power | Disconnected fiber, damaged cable, wrong wavelength pairing, or incorrect polarity. | Check the complete optical path and inspect the receive-power readings at both ends. |
| Low receive power | Dirty connectors, excessive insertion loss, poor splices, or unsuitable fiber. | Inspect and clean connectors and measure the link loss where necessary. |
| One direction works but the other does not | One fiber strand is disconnected, damaged, or incorrectly mapped. | Trace both Tx-to-Rx paths separately. |
| BiDi modules cannot communicate | Incorrect or non-complementary wavelength configuration. | Verify the specified BiDi pair and confirm the transmit and receive wavelengths. |
| MPO/MTP link fails | Incorrect polarity, fiber count, connector gender, or lane mapping. | Check the cable assembly against the transceiver's optical interface specification. |
| High error rate | Marginal optical power, fiber damage, lane imbalance, or incompatible settings. | Review optical diagnostics, lane status, FEC counters, and interface statistics. |
When troubleshooting, avoid changing several components simultaneously. Verify the local module, remote module, cable, and host configuration separately so that the source of the problem can be identified.
9. Calculate the Optical Link Power Budget
For longer fiber connections, checking the optical power budget is important. The available power budget represents the difference between the transmitter's minimum output power and the receiver's required sensitivity.
A simplified calculation is:
Optical Power Budget (dB) = Minimum Transmit Power (dBm) − Receiver Sensitivity (dBm)
For example, if a transceiver has a minimum transmit power of -2 dBm and a receiver sensitivity of -10 dBm, the nominal optical power budget is:
-2 dBm − (-10 dBm) = 8 dB
The total link loss includes fiber attenuation, connector insertion loss, splice loss, and losses from other passive components. The link is designed to operate within the available budget, with appropriate engineering margin.
Also check the receiver's maximum permitted input power. A signal that is too strong can overload the receiver, so optical power should remain within the specified operating window rather than simply being as high as possible.
10. Conclusion
Connecting two optical transceivers requires compatible modules, the correct fiber cable, proper connector polarity, and verification of optical signal levels. Duplex LC connections use separate transmit and receive fibers, BiDi modules use complementary wavelengths over a single fiber, and parallel-optics interfaces require accurate MPO/MTP lane mapping and polarity.
For reliable network operation, check both endpoints and the complete optical path rather than focusing only on the physical connector. Compatibility, fiber cleanliness, optical power budget, and host configuration all contribute to a stable link.
C-LIGHT offers optical transceiver solutions across multiple data rates and form factors for data center, enterprise, and telecommunications networks. View the optical transceiver product range or Contact C-LIGHT for product specifications and compatibility support.
 >

 >
 >
 >
 >
 >
 >
 >